

Sublimation printing allows you to create vibrant, full-color prints on fabrics, mugs, phone cases, and more. But sometimes, the final prints turn out dull or faded instead of bright and vivid.
If you’ve ever asked “How do I make my sublimation brighter?”,
This article is for you!
Below are 12 pro tips to help you achieve brighter sublimation every time. Whether you are new to sublimation or have experience, read on for troubleshooting advice and best practices.
you may also like:
- Can You Sublimate Stickers Using Sublimation Printers?
- Can You Sublimate on Vinyl? (Explained!)
- What Is Dye Sublimation? (An In-Depth Guide)
- How To Keep Sublimation License Plates From Fading
Why is my sublimation so dull?
Before jumping into solutions, it’s important to understand why your prints are dull in the first place. Here are some of the most common culprits behind lackluster sublimation:

Once you’ve diagnosed the likely reasons behind dull prints, you can take targeted steps to make corrections.
How Do I Make My Sublimation Brighter?
Below are 12 pro tips that you can follow to make your sublimation prints brighter:
1. Use High-Quality Ink
Investing in brand-name sublimation ink from reputable suppliers will make a world of difference. Avoid cheap third-party or refilled cartridges that can cause faded output.
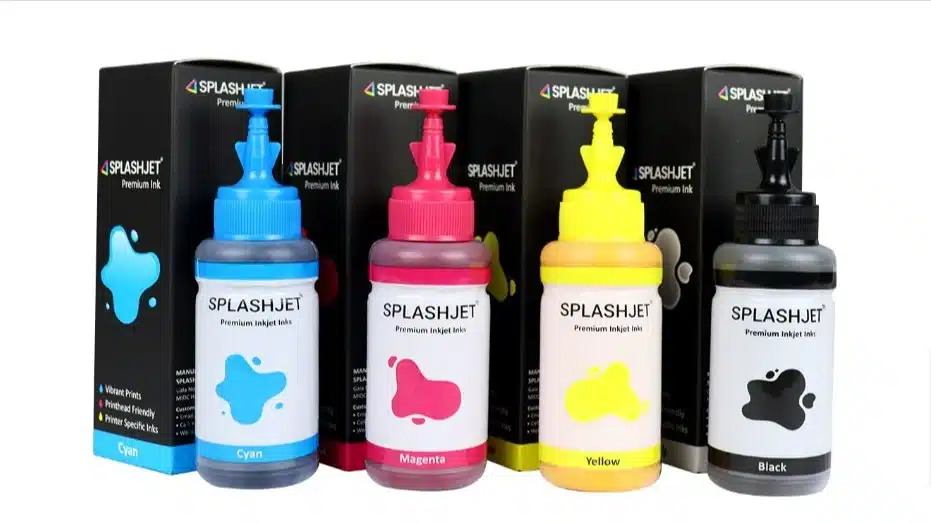
Top sublimation ink brands include Sawgrass and JTEKT. These companies specialize in formulating dyes specifically for the sublimation process. Their inks produce bright, saturated colors and stand the test of time without fading.
On the other hand, no-name inks found online at suspiciously cheap prices often lack the same vivid results. They may claim to work with sublimation but frequently fall short when it comes to color accuracy and longevity.
2. Install an ICC Profile
An ICC color profile compensates for differences between monitor displays and printers to improve print accuracy.
Most printers include stock ICC profiles, but downloading a custom profile for your printer model will maximize results.

ICC profiles essentially act as translation devices between devices, ensuring colors are displayed or printed true-to-life. Without one, prints tend to look duller and less accurate compared to how they appear on screen.
For example, RGB (red, green, blue) is used for monitor screens whereas CMYK (cyan, magenta, yellow, black) is used for printing. An ICC profile bridges this gap so colors match up between editing and physical output
3. Check Time, Temperature, and Pressure
Failure to follow substrate-specific heat press recommendations can prevent full ink transfer, causing washed-out prints. Refer to manufacturer guidance or perform test presses to dial in ideal settings.
Sublimation relies on a careful balance of heat and pressure to turn the print’s solid dyes into gas form for transferring onto polymers in the substrate material.

Deviating too far from a substrate’s sweet spot on any variable decreases the ink’s ability to properly sublimate.
For example, excessive heat can scorch or burn material. Overly high pressure also risks damaging more fragile substrates like ceramics. On the other hand, too little heat or pressure prevents full dye release from the paper.
Getting the time element wrong also causes issues. Insufficient dwell time does not give dyes enough exposure to fully transition from solid to gas.
4. Print High-Resolution Images
Pixelated images and graphics should be avoided in sublimation. Use vector files or high-resolution JPG/PNG files at 300 dpi or above.
Scale images up before printing versus enlarging small files. Printing low-resolution images is one of the biggest contributors to lackluster sublimation.

Fuzzy, pixelated graphics do not contain enough color data to translate into prints properly. For sharp, vibrant output, always supply your printer with high-resolution source files instead to maximize color accuracy.
Vector formats like SVG and PNG files work very well, retaining edge clarity no matter the size. Similarly, photographs and other raster images should clock in around 300 PPI before printing.
5. Use Polyester Substrates
Since sublimation relies on ink bonding with poly fibers, always use 100% polyester fabrics and coated items. If using cotton, apply a poly treatment spray first.
The Science Behind Brighter Sublimation on Polyester, let’s do a quick chemistry recap. Sublimation utilizes heat to convert solid printer ink into a gas that permanently bonds with polyester fibers.

By merging with the fabric rather than simply laying atop it, sublimation achieves breathable, vibrant printing. Cotton and other fabrics lack this bonding capacity.
Their surfaces quickly shed imprinted dyes after washing, resulting in faded crackled prints.
6. Clean and Maintain the Printhead
Print nozzles can get easily clogged over time, causing spotty and inconsistent output.
Perform regular cleanings and nozzle checks. Replace old cartridges. Printhead maintenance and upkeep are vital for yielding vibrant sublimation.

Over time, dust, paper fibers, dried ink, and other debris gunk up the tiny nozzles responsible for firing ink onto paper. Usually, the first sign of clogged nozzles is faded or missing stripes in test prints.
Left unaddressed, this progresses to full printhead failure. Thankfully, most quality printers have built-in cleaning cycles accessible from menus. Run these periodically based on usage levels as part of routine maintenance.
7. Avoid Ghosting
“Ghosting” refers to faded duplicate images in sublimation caused by paper movement. Use heat-resistant tape to secure paper edges before pressing.
Pressure, heat, and dwell time may all be perfectly calibrated during the sublimation process. But a surprise shift in paper alignment ruins the print.
This causes “ghosting”, a secondary, faded imprint of the image offset from the primary design. It steals vibrancy and brightness away right when you thought the process was going smoothly.
The culprit? Failure to properly secure print paper against movement while the heat press works its magic. Thankfully, a couple of pieces of heat-resistant masking tape easily tackles this issue
8. Double Check Printer Settings
On printer dialog boxes, disable any duplexing, ink savings, or draft quality options. Select settings for premium photo paper and high-quality/best printing.
Before hitting “print”, carefully review preferences to catch any misconfigurations that create dull prints. Otherwise, optimal image files translate poorly coming out of the printer itself.

Always make sure your document dimensions match the paper loaded into the printer to avoid automatic scaling or cropping. Disable default duplexing settings to prevent backsides from getting inadvertently printed on.
Additionally, toggle off any ink-saving or draft speed options intended to conserve costly ink volumes or expedite jobs. These shortcuts minimize output vibrancy.
9. Print on the Correct Paper Side
Sublimation paper is coated on one side to facilitate ink bonding and transfer. Accidentally printing on the uncoated side will sabotage results.
With all the complexity involved in sublimation, making sure to print on the proper paper side seems almost too obvious to mention. But this small oversight triggers immediate print quality setbacks.

Sublimation paper’s magic comes from proprietary polymer coatings applied during manufacturing. Usually, one side has a brighter white finish to it.
This coating prevents ink beading while enabling defined print detail. Flipping sheets over to the uncoated backside foils the entire system.
10. Allow Proper Ink Dry Time
For the ink to fully saturate the paper, allow prints to dry adequately before heat pressing. Avoid paper smudging or blotchiness.
Patience pays off for radically improving the vibrancy of sublimated prints. Although inconvenient, neglecting to build in proper dry times dulls down results.
Unlike traditional inkjet printing on copy paper, sublimation introduces extra ink saturation into the print medium thanks to high heat and vaporization.
Rushing newly printed sheets into heat pressing skips an important solidification window.
11. Press Light Garments First
When pressing both dark and light shirts, always start with light colors first. Residual dye from dark shirt presses can discolor subsequent prints.
Here’s an easy-to-prevent yet catastrophic print quality issue many new sublimators encounter. When heat pressing a batch of shirts comprising both whites and darks, press all the light garments first.

Dark fabric dyes contain abundant pigment not fully removed during shirt pre-treatment. Pressure and heat drive trace amounts of these darkened dyes into sublimation paper during transfers.
12. Invest in a Quality Heat Press
Inconsistent heat and pressure provided by low-cost heat presses introduce more room for user error. Opt for an industrial-grade model with accurate temps and even clamping.
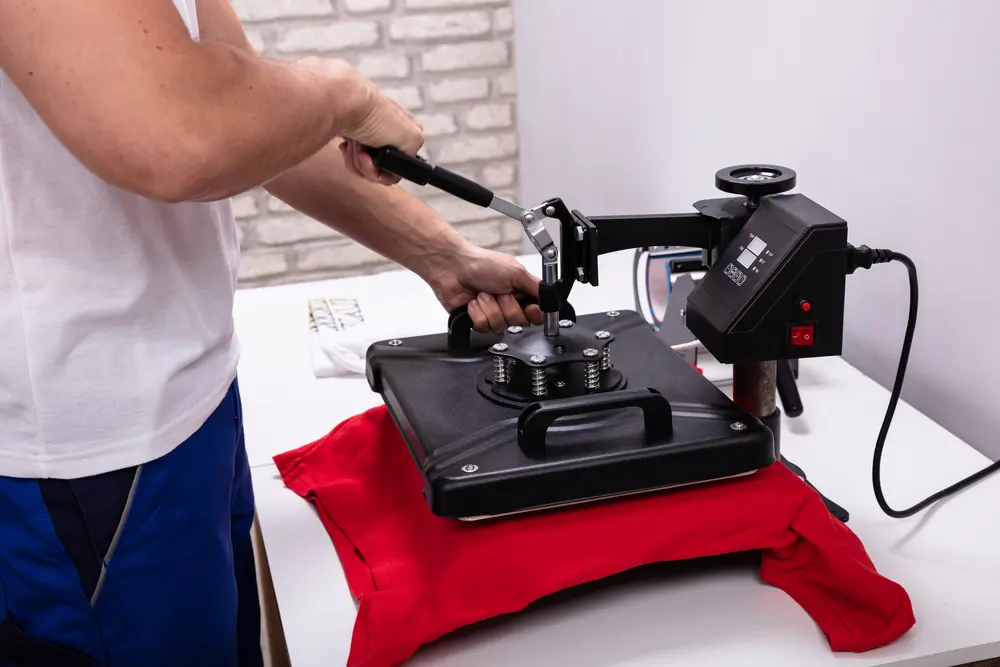
A quality heat press designed for precision sublimation work makes all the difference when aiming for brilliant, photograph-like prints. Steer clear of small format consumer presses lacking controls.
By removing variability and inconsistency from the heat transfer process itself, true industrial-grade equipment maximizes repeatable print quality.
frequently asked questions
Here are answers to some frequently asked questions about improving sublimation print brightness:
What is the best resolution for sublimation?
The best resolution for sublimation is 300 dots per inch (dpi). The high resolution helps the colors look very clear and vivid when they transfer onto mugs, shirts, and other items. Low resolution makes the image look fuzzy or blurry.
Which color mode is best for sublimation?
The best color mode for sublimation printing is RGB. RGB stands for red, green, and blue. Screens and computer monitors use RGB.
To get the brightest, most accurate colors for sublimation, you need a special profile to connect RGB on the screen to CMYK for the printer. This helps translate the colors correctly.
Wrapping Up
With sublimation printing, vibrant and long-lasting results are achievable when you use appropriate materials and follow the right techniques.
By using high-quality dye sub ink, polyester substrates, optimal printer maintenance habits, suitable image files, precise heat settings, and quality accessories, your prints will turn out vivid each time.
Refer to these pro troubleshooting tips whenever brightness proves difficult. With attention to detail and consistency in adopting best practices, your custom prints will impress customers with eye-catching radiance and lifelike definition.

