

Customizing your own tumbler with a personalized design can seem like an uphill task.
What many don’t know is sublimation – a technique that embeds designs onto items, including tumblers.
In this guide, we break down the steps you need to know on how to sublimate a tumbler and provide you with easy-to-follow instructions to help you create a masterpiece from scratch.
Ready to sublimate your tumbler? Let’s get started!
Key Takeaways
How to Sublimate a Tumbler (Step By Step)
To start sublimating a tumbler, gather all the necessary supplies and tools you’ll need for the process. So let’s see what material do we need to have before starting the tumbler sublimation process.
Before we move ahead, I would want you to watch this amazing video by Crissy Creates Official.
She have made the entire process so easy to follow.
1. Gather necessary supplies and tools
To sublimate a tumbler, you will need the following supplies:
- A blank tumbler designed for sublimation.
- Sublimation printer filled with sublimation ink to print your design.
- Sublimation paper, on which the design is printed.
- Heat-resistant tape for placing your design onto the tumbler.
- Sublimation shrink wrap bags, to place your tumbler in before heating.
- A heat press with mug press attachment or convection oven to apply heat and transfer the design to the tumbler
- Heat-resistant gloves to protect your hands when handling heated materials.
- A clear coat or epoxy resin if you decide to seal the final product for added protection and sheen.
2. Choosing the Right Design
The first and most important step in sublimating a tumbler is choosing or creating the right design. You want a high quality image or graphic that will transfer well and look sharp on the final product.
Take some time to look through stock image websites like Shutterstock to find an appropriate design.
Consider if you want an abstract geometric pattern, floral elements, fun sayings or quotes, monograms, or even photographic images.
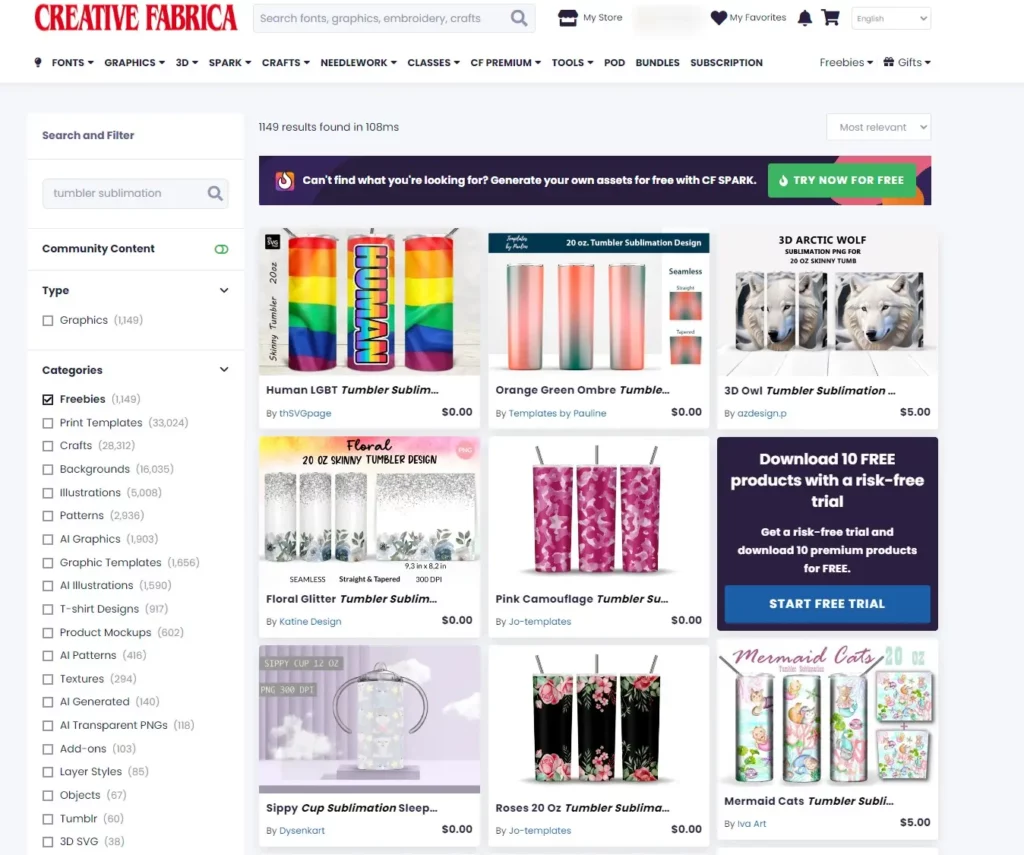
I highly suggest you get your sublimation designs from Creative Fabrica, as this is what i use for my projects as well.
There are thousands of designs that are ready for sublimation and comes with commercial license as well, so do check them out.
If you want to create your own custom design from scratch, you can use programs like Photoshop, Adobe Illustrator and Canva will work too.
Design something simple that will translate well to sublimation printing. Remember, less is often more when it comes to graphic design elements.
Bold shapes, patterns, text, and colors tend to show up better than faint and complex designs. Spend time perfecting your design and get it ready for printing.
3. Choosing the Right Paper and Inks
Sublimation requires specialized paper and inks that vaporize and bond to the polymer coating on tumblers and other items during the heat press process.
Be sure to use inkjet printers compatible with sublimation inks, as well as paper specifically made for sublimation transfer.
Popular brands like TexPrint or Beaver paper work very well. Follow the printer and paper manufacturer’s guidelines on print settings.
An appropriate high quality print mode will be necessary, like “Best Photo” or equivalent setting. This slows down the print speed while maximizing ink saturation and detail.
Always use inks formulated specifically for dye-sublimation. They contain special heat activated dyes that vaporize when heat is applied.
Use ink cartridges from reputable brands known for quality sublimation like Sawgrass.
4. Getting the Print Ready
Once your design is ready and your paper and ink is loaded in your printer, you’ll need to set your design correctly for printing. Open the file in Photoshop or another image editing program.
Make sure the dimensions match the size you want the design to be on the tumbler. Double check the resolution is 300 PPI or higher.
This gives enough image detail for the design to print cleanly. Resize or adjust the design if needed to get the right print size and quality.
It’s best to print directly from Photoshop to get better quality. So after finalizing your image, press Ctrl/Cmmd + P on your keyboard to bring up the printing menu.
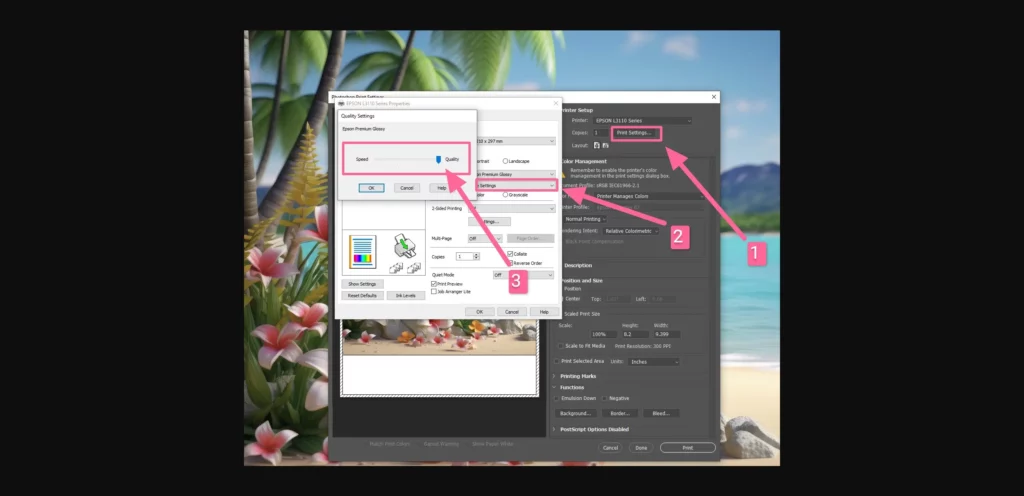
Make sure to choose the highest quality print setting and the ICC profile is selected in the print settings.
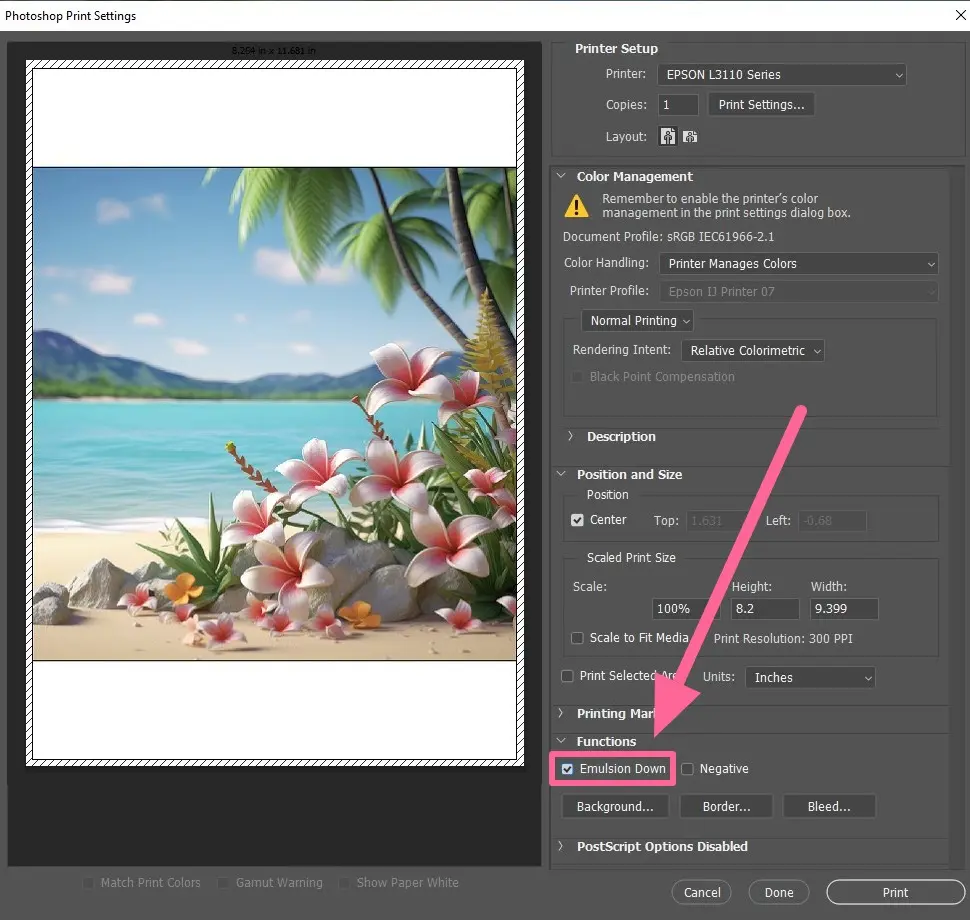
You also need to click ok “Emulsion Down” to reverse the orientation of the image so that it will show perfectly after sublimation.
When everything looks okay, you can click on the Print button to print your design.
5. Placing The Print Around The Tumbler
Once your design is printed out, you’ll need to do some trimming to get it ready for the tumbler. Take your time and carefully cut out the printed design from the sublimation paper.
Remove any excess paper around the image so only the design itself remains. What you are left with is the printed transfer that will go on the Tumbler.
Having a clean-cut transfer maximizes the image area for the sublimation process.

After removing the excess paper, wrap your printed paper around your tumbler and affix it with heat-resistant tape.
Apply the tape to the entire seam so that the paper won’t move from its place during the sublimation process.
Also do not forget about the edges too, tape them properly so that it won’t move.

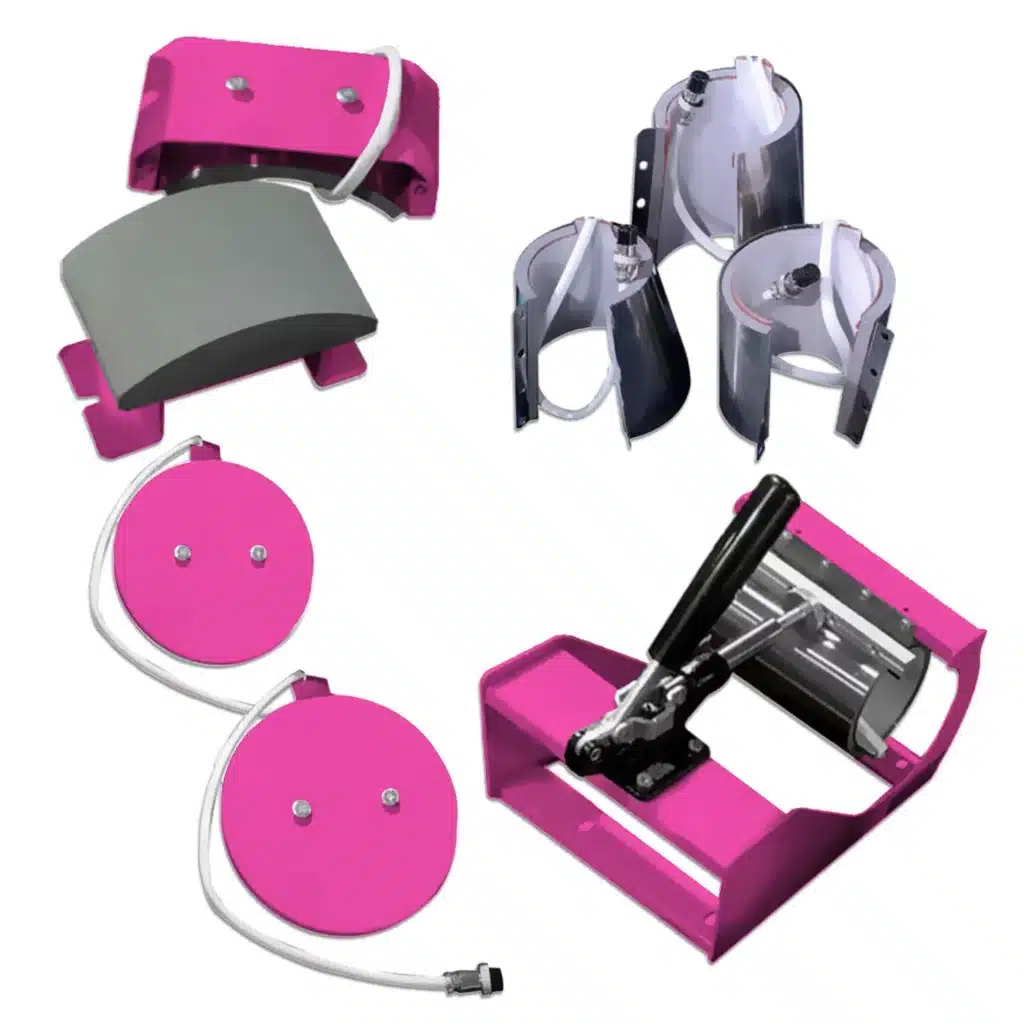
6. Sublimating The Tumbler (Using Mug Press)
With the printed transfer ready and the tumbler cleaned and prepped, you are ready for the final heat press stage.
With your mug press warmed up to the men, gently position the tumbler inside, making sure to align the template seam with the press seam.
Now because the mug press is typically small in size it won’t cover your entire tumbler in one go, you may have to press it 4 times, and wait 4 times? but how?
let me explain:
Insert your tumbler inside the mug press with the paper seam at the top:
- Press the upper part of the timber For 50 seconds
- Now push it inward and press the bottom part of the tumbler for 50 seconds
Now rotate your tumbler by 180 degrees so that this time the paper seam will be at the bottom:
- Now again press the upper part of the tumbler
- Push it inwards and press the bottom part to finish the process
This technique will evenly distribute heat on the entire tumbler even while using a small mug press.
If your attachment is large enough to cover the entire tumbler in one go then you can press it a couple of times and it will do the work.

7. Sealing the Sublimated Tumbler (Optional)
To give your sublimated tumbler added protection and a glossy finish, you have the option to apply a clear coat or epoxy resin.
Apply a clear coat or epoxy resin for added protection and shine
To give your sublimated tumbler that extra layer of protection and a beautiful glossy finish, you can apply a clear coat or epoxy resin. This optional step not only adds a professional touch to your creation but also helps to extend the lifespan of the sublimated design.
The clear coat or epoxy resin acts as a barrier against moisture, scratches, and fading, ensuring that your design remains vibrant and intact for longer periods.
By carefully coating the entire surface of the tumbler with thin, even layers of clear coat or epoxy resin, you create a smooth and durable finish that is resistant to stains and easy to clean.
This sealing process enhances both the appearance and longevity of your sublimated tumbler.
How To Sublimate a Tumbler With Convection Oven
If you don’t want to invest in an expensive heat press, you don’t have to worry, you can get the job done with a convection oven that costs less than $100.
Watch this amazing video by Hey Let’s Make Stuff.
Firstly, preheat your oven to around 375 degrees so that i will be ready until you finish setting up your tumbler.
The next thing you have to do is cover your printed design around your tumbler and fix it properly using heat-resistant tape.
So, because a convection oven doesn’t provide the pressure as heat press does, you need a special thing called Shrink Wrap, this will shrink around your tumbler when placed inside the oven and provide enough pressure to the surface of the tumbler so that the print gets distributed evenly.
Now cover the entire tumbler using a shrink wrap and place it inside your preheated oven and set the timer to around 6 mins.

As soon as you place the tumbler inside the oven the shrink wrap will start shrinking and it’s so satisfying to see that.
To avoid uneven prints, you can flip your tumbler inside the oven when it is cooking although i don’t think it is necessary with today’s modern convection ovens.
After 6 mins, wear heat-resistant gloves and safely take out the tumbler from the oven.
Remove the shrink wrap immediately as soon as you take out the tumbler, cause if you let it cool it will get stuck to the tumbler and destroy the design. Always wear gloves while doing it.
So voilaa!! you are done!!
You have successfully sublimated the tumbler using your convection oven.
Tips for Washing and Caring for Sublimated Tumblers
Hand washing with mild soap and water is recommended for keeping sublimated tumblers looking their best. Avoid harsh detergents and scrubbing that can degrade the print over time.
Never wash in the dishwasher, as the harsh temperatures and chemical detergents will quickly fade and ruin the sublimated artwork.
For maximum vibrance, wash the tumbler in cold water and avoid long soak times. Always air dry thoroughly instead of hand drying to prevent lint and rough handling from damaging the print.
Store sublimated tumblers carefully and avoid any scraping or chipping of the edges or interior that can impact the design.
Following proper care and washing methods allows your custom sublimated tumbler to maintain its brilliant colors and graphics for many years of use!
How to Sublimate a Tumbler – Frequently Asked Questions
Can I Sublimate A Tumbler In A Conventional Oven?
Yes, you can totally sublimate a tumbler in a regular oven! Just make sure to set the temperature right and follow the instructions. It might take a bit of trial and error to get the perfect result, but as long as you’re careful, you can give it a shot.
Can I Use My Existing Connection Oven From My Kitchen?
Absolutely not, your existing convection oven is what you are using to cook your food you definitely don’t want to spoil it from the harmful chemical fumes that come from ink and papers when they are placed inside the oven, so please invest some money and get a separate convection oven specially for sublimation.
Can I Cook Food In My Sublimation Convection Oven?
Again a no, the reason being the same. During the sublimation process, the special inks convert into a gaseous state, and some of these vapors get stuck inside the oven chamber and cooking in such an environment is very unsafe.
So do not cook any food in the oven that you have already sued for sublimation purposes.
What Temperature Do You Sublimate Tumblers?
Yes, so like, when it comes to sublimating tumblers, it’s all about finding that sweet spot temperature-wise. You gotta hit just the right temp to get that cool sublimation effect. Usually, we’re talking about around 400 degrees Fahrenheit. But hey, every tumbler and design is different, so it’s always best to experiment and see what works for you.
Final Words
Hope you found my efforts on “how to sublimate a tumbler” useful. Stay tuned for more amazing tutorials as i am working on a lot of stuff so a lot of exciting tutorials coming you way.
IIf you have any questions, you can comment down below, i would love to help you out.


