

Have you ever wanted to make your own custom t-shirts, mugs, or other items with full-color images and designs?
It’s cool! The process is called sublimation printing. It uses special paper and ink to transfer images permanently into fabrics, ceramics, and more.
In this article, I’ll explain ‘How do you apply sublimation transfers?’. It might sound complicated, but I’ll break it down so it’s easy to understand.
You’ll learn what equipment and supplies you need to get started and the step-by-step process for applying sublimation transfer.
I’ve also got some pro tips to help you troubleshoot problems and make sure your transfers turn out perfectly every time.
So get ready to unlock the secrets to making your own incredible custom bags, apparel, decor, and more! Let’s get started.
you may also like:
- What Are Sublimation Mugs? (The Complete Guide)
- What is Sublimation Jersey? (Benefits, Process…)
- What is Sublimation Coating Spray? (Explained!)
- Are Sublimation Mugs Microwave Safe? (Yes, They Are But..)
Supplies needed for applying sublimation transfer
Applying sublimation transfers requires heat and pressure to bond the dye to the substrate.
Here’s the key equipment you’ll need:
- Heat press: You’ll need an actual heat press to apply enough precise pressure. Home irons and heat presses like the Cricut EasyPress aren’t suitable.
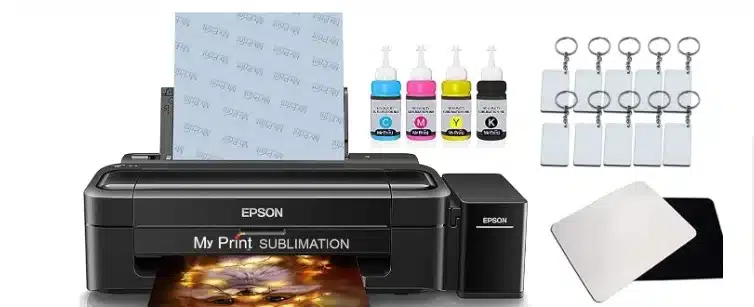
- Sublimation printer and ink: To print your transfers onto special sublimation paper, you’ll need a professional dye-sublimation printer and ink. Many affordable Epson and Ricoh models work well.
- Sublimation paper: There are a few types of paper to choose from. Make sure yours is compatible with your printer and the material you’re transferring onto.
- Polyester blank item: Sublimation only bonds well to synthetic fabrics like 100% polyester or specially-coated ceramics and metals.
- Heat-resistant tape: Used to secure the paper transfer in place.
- Teflon sheet: For protecting your heat press and transfer from direct contact.
How Do You Apply Sublimation Transfers?
With the right blank items, paper transfers, machinery, and supplies, you’re ready to start applying for transfers. The basic technique is straightforward once you know the steps.
Here is the complete process broken down:
1. Print transfer

If designing your own, create the graphic on your computer (remember to flip/mirror it since the transfer reverses the image). Print onto sublimation paper using your professional inkjet printer filled with sublimation ink.
Allow printed transfers to fully dry before application, so the still-wet ink does not bleed or distort when pressed. Drying overnight is ideal, but a heat gun can speed things along if you’re in a rush.
2. Prepare the item
If using a fabric like a polyester t-shirt or cutting board sleeve, take a minute to pre-press it first. Quickly run the item through your heated press for 5-10 seconds before adding your transfer.

This both removes wrinkles and any moisture in the fabric which can prevent ink from absorbing evenly. Use a lint roller as well to remove stray fuzz or debris.
3. Secure transfer
Trim around the printed transfer paper closely without cutting into the actual design/image. Leave just 2-3mm of blank border.
Then take your heat-resistant tape (pieces already pre-cut for speed) and carefully attach the back of the transfer paper to the front of your shirt/item so the design itself faces down against the surface.

Avoid bubbles, overlap, or leaving parts of the transfer unsecured, as heat and pressure can cause unsecured sections to distort.
4. Heat press
Ensure your heat press is already fully pre-heated to the right consistently maintained temperature which again varies based on things like material thickness and transfer paper type (usually somewhere around 400° F is needed).

Place your item with transfer taped face-down onto the bottom platen of your heat press. Then take your Teflon protective sheet and smoothly sandwich it over the top covering both the item and the hottest upper heating element.
5. Apply pressure
The pressure and time duration vary based on things like your substrate/garment type and thickness, the brand of transfer paper being used, the size of your transfer design, etc.
Typical application time can be anywhere from 40-90 seconds at high-medium pressure around 400°F. Start conservatively based on paper and item recommendations then adjust as needed.

6. Remove The Transfer
Once the timer expires, disengage the press lock and slowly lift the heated upper plate up and away leaving the lower plate in place. This allows residual ambient heat in the lower plate to continue curing without risk of scorching.
After a few seconds, you can carefully remove the still-warm item and peel away just the now-empty transfer paper to reveal your image transferred onto the polyester or hard good surface.

Throughout the process, be very careful handling the hot press and follow all manufacturer safety guidelines. With good transfers and the proper equipment and technique, your results should be stunning!
Tips for Successful Transfer Success
Follow these tips and best practices when transferring:
Frequently Asked Questions
Still, have some questions about applying sublimation transfers. Here are answers to some common FAQs:
Do you need a heat press for sublimation transfers?
Yes, you absolutely need an actual heat press for sublimation. Home irons and mini presses like the EasyPress do not get hot enough or apply even pressure to properly transfer sublimation ink. You need an affordable clamshell press that reaches ~400°F.
How is sublimation applied?
Sublimation is applied using heat and pressure to convert the solid dyes into gas form temporarily. The gas permeates into poly fibers or polymer coatings and then solidifies into permanently bonded images as it cools.
How long do you press a sublimation transfer?
Typical sublimation press times range from 40 to 90 seconds at ~400°F. The specific time and temp vary based on the fabric or material type and thickness.
Always check specific recommendations for your transfer paper and blank substrate.
Wrapping up
Like any craft, mastering sublimation transfers takes some practice as you hone techniques and settings for different materials.
But once you get the hang of it using the steps and tips above, the vibrant and durable results are well worth it.
Experiment with different graphic designs and blank substrates from t-shirts to phone cases and ceramic tiles. Just be sure you always have the right tools and protective equipment when handling the heat press.
Thoroughly research your specific printer, transfer papers, blanks, temps, dwell times, etc. to avoid wasted materials from bad transfers. Take notes and test frequently as you refine your process.
With a little patience, creativity, and persistence, you can churn out all sorts of customized and personalized sublimation projects to sell or give as special gifts.


